5 Steps to Repair Access Database Files Using Our Tool
STEP 1:Run the software on your system
Go to Start > Programs > Access Recovery. Initial software screen appears as shown in the below screenshot:

STEP 2: Browse corrupted MDB file
Click “Browse” to select the corrupted Access database MDB file. As you click, following screen will appear:

STEP 3: Choose the corrupted MDB file that you want to repair and then click “Open”
The location path of the selected MDB file will be shown as follows:

STEP 4: Access database repair and recovery process
Click “Recover” to start the Access file recovery process as follows:

STEP 5: Preview recovered contents
After the recovery process, you can preview the repaired file with all its recoverable components like tables, views etc as shown below:

STEP 6:Export and save recovered contents to your system
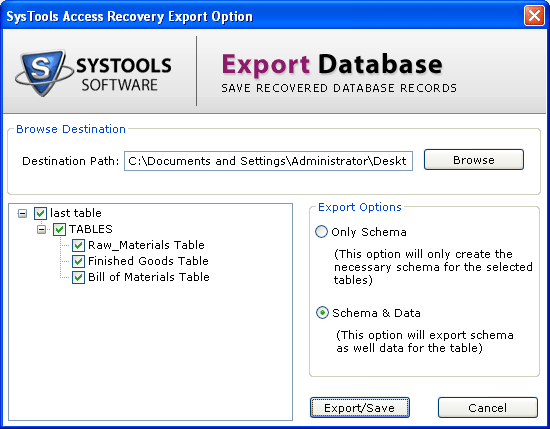
After previewing the database contents, click “Export” to save the repaired MDB file to your system. As you click, following screen will be displayed:

STEP 7: Click “Browse” to select a destination path.
STEP 8:Choose one of the two available “Export Options”
STEP 9: Only Schema: On choosing this option, software will only create the necessary schema for the selected tables. You will need to select the tables, which are to be saved, from the left-bottom pane.
STEP 10:Schema & Data: On choosing this option, software will save schema as well data for the table. You will need to select the tables, which are to be saved, from the left-bottom pane.
STEP 11:After selecting an Export Option, click “Export/Save”.